Configure entry and protections
Settings determines who can enter, whether they may return, when they leave, and how the Journey protects them from excessive contact.
Add an entry trigger
Open the Journey, then Settings. Choose a trigger kind and select Add Trigger.
| Trigger | Use it when |
|---|---|
| Segment entry | a person newly matches a saved Segment after activation |
| Membership started | a prospect lead moves to Won through FitStack; optionally include reactivation |
| Member created | a member record is created through a non-bulk FitStack flow |
| Calendar booking confirmed | a booking linked to a member is confirmed |
| Manual enrollment | approved staff will choose members individually |
Segment entry uses a nightly change check. People who already match when the Journey activates are baseline members; the trigger is for later entry into the Segment.
Membership started does not currently fire when an external ABC or GymSales sync moves a lead to Won. Member created does not fire for GymSales or Klaviyo bulk-sync creation. Use these triggers only for the FitStack and non-bulk creation paths described above, and monitor synced onboarding separately.
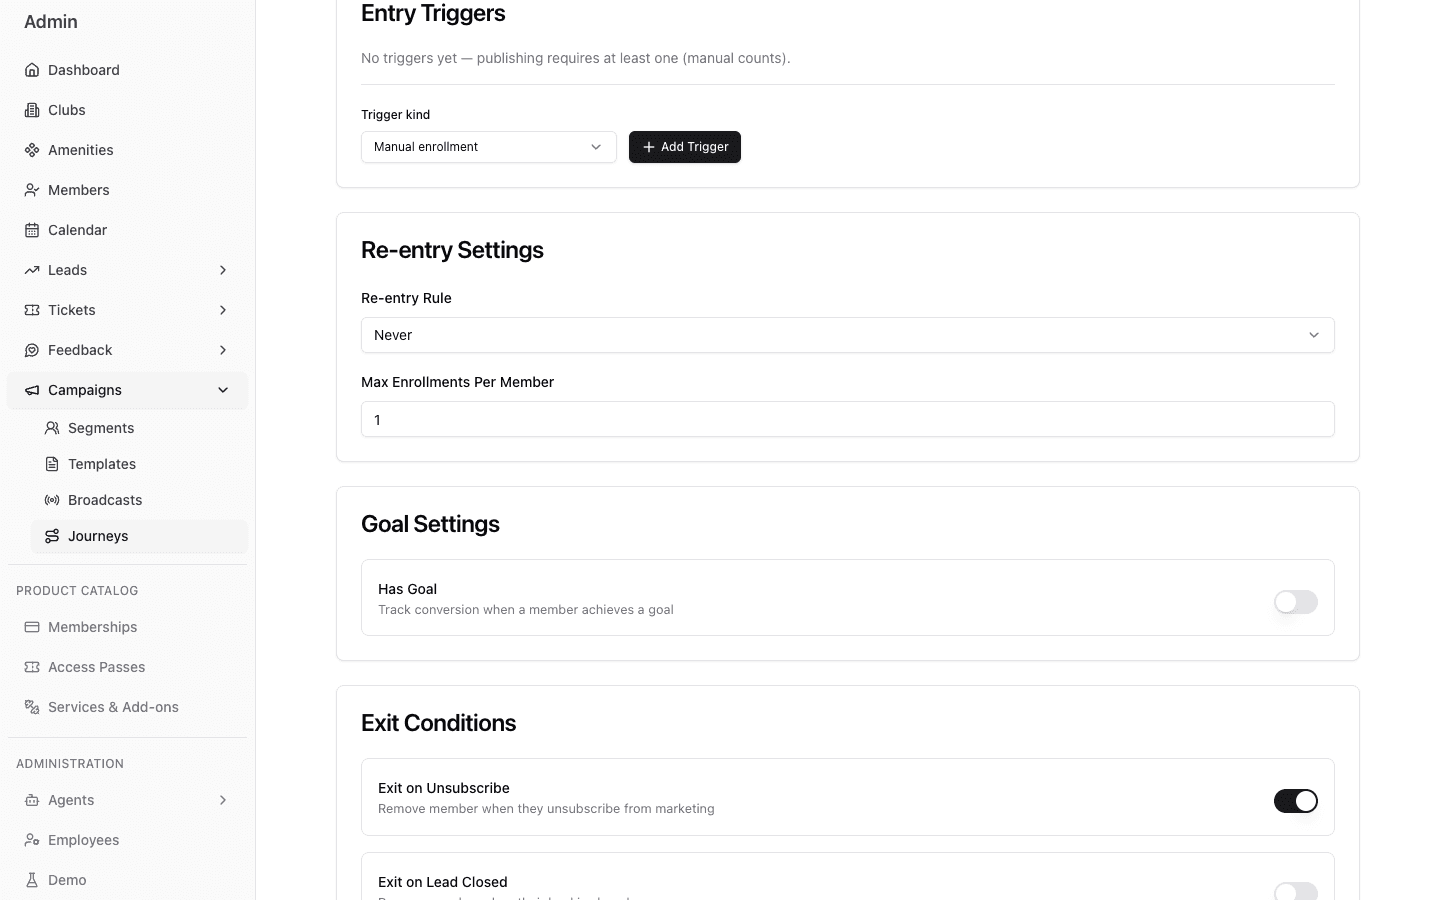
- 1Select the event that proposes enrollment.
- 2Add Trigger is persistent; verify the choice first.
- 3Choose when a previous participant may return.
- 4Cap lifetime enrollments separately from the re-entry rule.
Set the re-entry policy
- Never — one lifetime enrollment.
- Always — allow another enrollment after the prior one is terminal.
- After Exit — allow a return after the previous enrollment leaves.
- After Duration — require the configured delay after exit.
Max Enrollments Per Member is an additional lifetime cap. FitStack still prevents simultaneous active enrollments in the same Journey.
Review the goal settings
The current Admin can save Has Goal, an event type, and Goal Exits Journey, but FitStack does not yet process goal events for Journeys. Goal conversions remain zero, and reaching the named event does not exit an enrollment.
Do not rely on these settings for conversion measurement or stopping outreach. Track the intended business outcome outside Journey analytics until goal processing is available.
Choose active exit protections
Use:
- Exit on Unsubscribe to remove a member who withdraws marketing consent;
- Max Duration to define how long an enrollment may remain eligible.
Max Duration is enforced only when the enrollment reaches an Eligibility Gate after the cutoff. Put a gate on every workflow path that can continue after the configured duration, before any later outreach.
Exit on Lead Closed is currently stored and displayed but does not stop a Journey enrollment. Goal Exits Journey is also inactive while goal processing is dormant. Do not use either setting as an outreach safety control; use an active workflow Exit or cancel the Journey when follow-up must stop.
Set message limits
Use Global Message Limit for the total messages sent during one enrollment. Use Daily Message Limit for messages sent during the preceding rolling 24 hours of that enrollment.
Re-entry creates a new enrollment with fresh limits. These settings are not lifetime per-member caps or calendar-day caps.
Add an Eligibility Gate on every relevant path after waits or branches so consent, duration, and message limits are rechecked before more outreach.
Configure an opportunity destination when needed
If the workflow contains Sales Opportunity, or a Call to Action with an opportunity outcome, choose a lead pipeline and optional nonterminal stage. This campaign-level destination is the fallback for nodes without their own destination.
Save Changes
Review the full page, then select Save Changes. Most settings are editable only while the Journey is Draft. A live Journey limits editing to the opportunity destination.
Adding or removing a trigger takes effect immediately. The current Admin action has no confirmation dialog. A live Journey must retain at least one trigger.