Organize amenity groups and display order
The catalog has two ordered levels:
- Amenity groups, such as Club Area, Recovery Services, and Youth Programs.
- Amenities inside each group.
The public club experience uses group order first and amenity order second for the amenities assigned to that club. Order therefore communicates priority; it is not cosmetic cleanup.
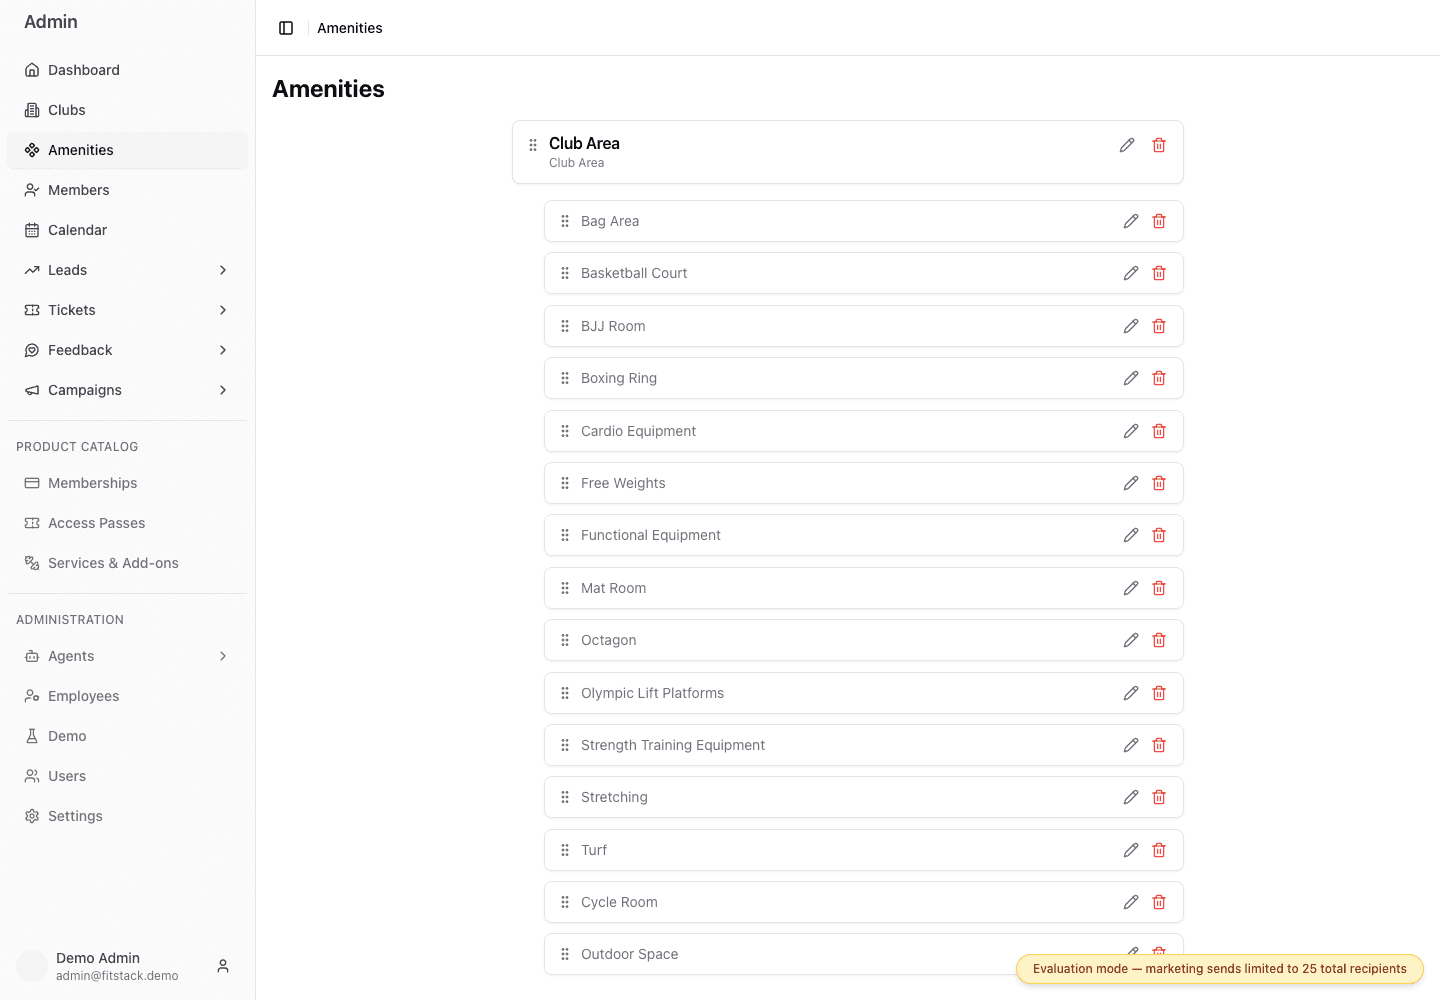
- 1Drag the group handle to change group order.
- 2Drag an amenity to reorder it or move it into another group.
- 3Edit or delete the shared amenity from its row.
Reorder safely
Decide the intended public sequence
Place the most important or broadly useful groups first. Within a group, put the amenities members are most likely to look for before specialized options. Review the entire group rather than moving one row in isolation.
Drag the handle
Drag a group by the handle next to its heading. Drag an amenity by the handle next to its name. Drop an amenity near the intended item when reordering it or moving it into another non-empty group.
Wait for confirmation
Dropping the item saves immediately. Wait for the success message, then refresh the page and verify the saved group and order. Do not assume the drop position is the final saved position. If it differs, try once more after checking your connection; if the same mismatch repeats, stop and ask FitStack support or the product owner to correct the order.
Verify a representative club
Open a club that has the moved amenity assigned. Confirm the Admin club list is still correct and, when timing matters, verify the public club page after its cache refreshes.
Moving an amenity into another group changes its shared classification for every club. It does not change which clubs have the amenity assigned.
Create a group
Create a group only when the existing categories would mislead users. Select + Add Amenity Group, then complete:
- Name — the member-facing group heading;
- Code — a unique, stable identifier that can support links and filtering;
- Description — a concise explanation of what belongs in the group; and
- Image URL — a stable public image for group presentation where supported.
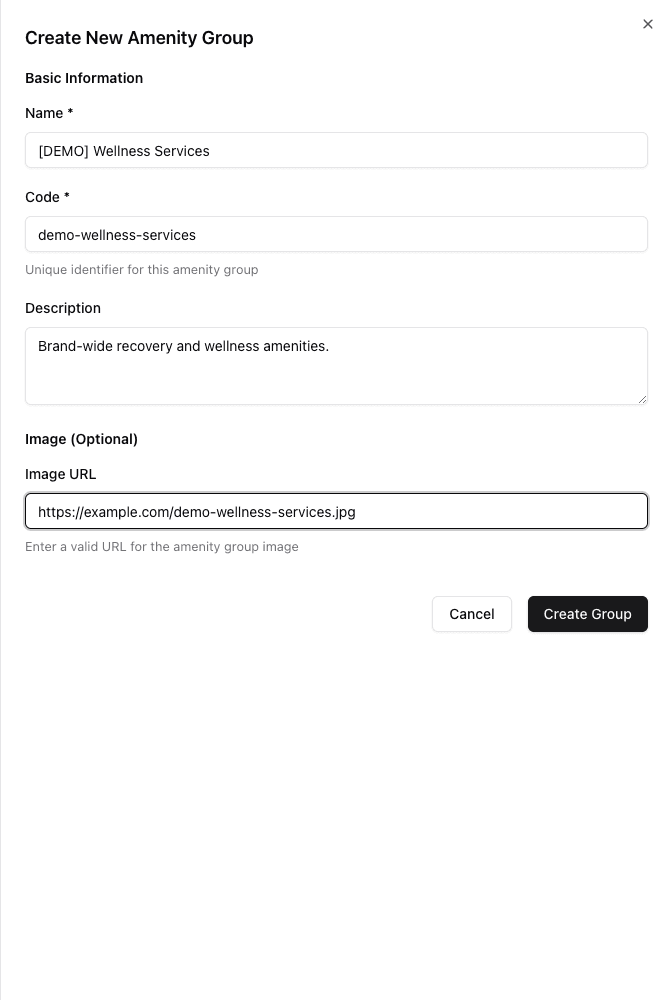
- 1Use a clear name and stable unique code.
- 2Explain which amenities belong in this group.
- 3Use a publicly reachable group image URL.
After selecting Create Group, drag the new group from the end of the catalog to its intended position. An empty group row is not an amenity drop target. Select + Add Amenity inside the new group to create its first intended amenity. Once the group contains an amenity, move other items into it by dropping them near the existing amenity, then refresh and verify the saved position.
Do not create a placeholder amenity just to make an empty group accept a drop. If the new group should contain only existing catalog records, stop and ask the product owner or FitStack support for a controlled workaround.
Delete a group
A group cannot be deleted while it contains amenities. Reassign or retire every amenity first, review the public ordering, then delete the empty group. This guard prevents a group deletion from silently removing its contents.